From Photo/Video to Robot: Building a Real-to-Sim Pipeline in a Weekend#
There's a gap in robotics that's always bothered me. You can spend weeks in simulation perfecting a manipulation task (grasping a mug, opening a drawer, stacking plates) and then watch it completely fall apart the moment you deploy onto a real robot in a real kitchen. The environments are different. The lighting is different. The physics assumptions are different. And bridging that gap is brutally hard.
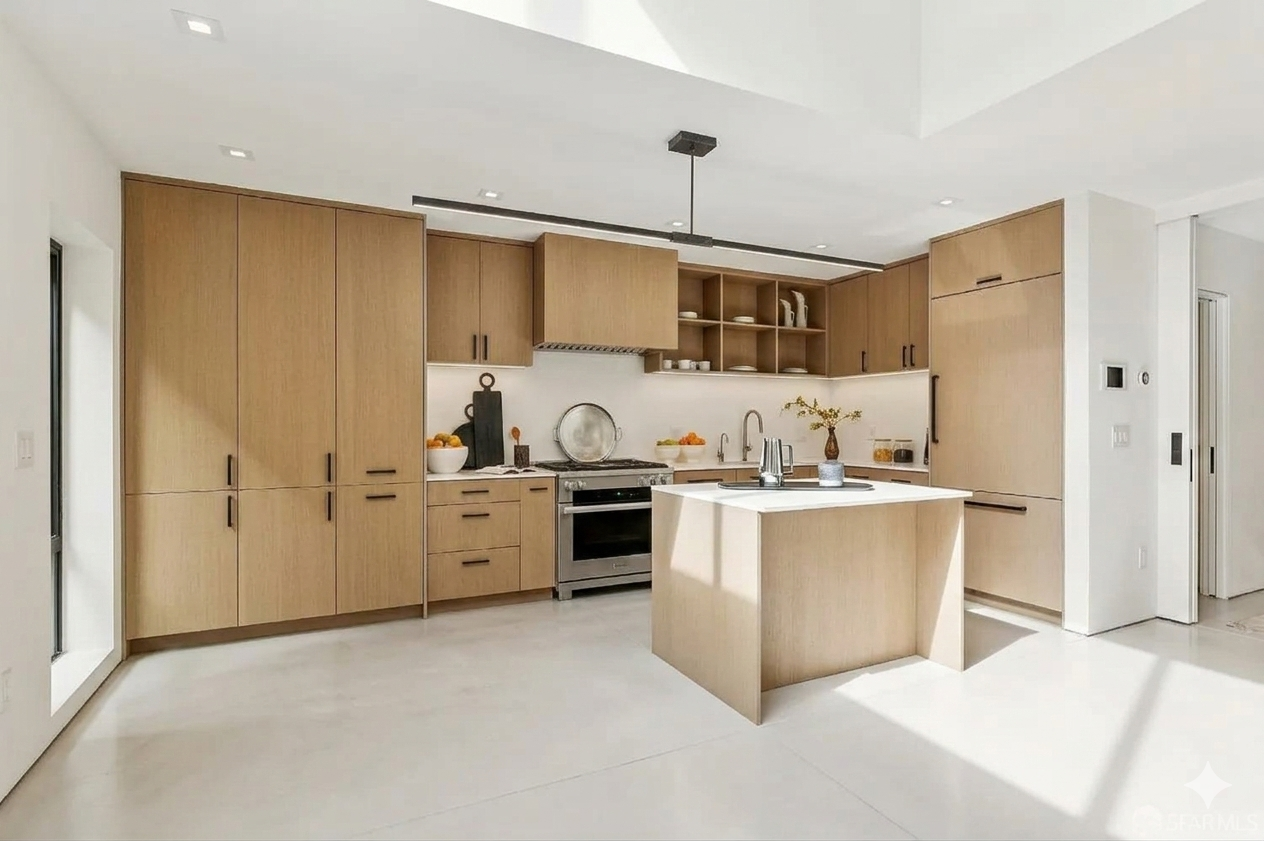
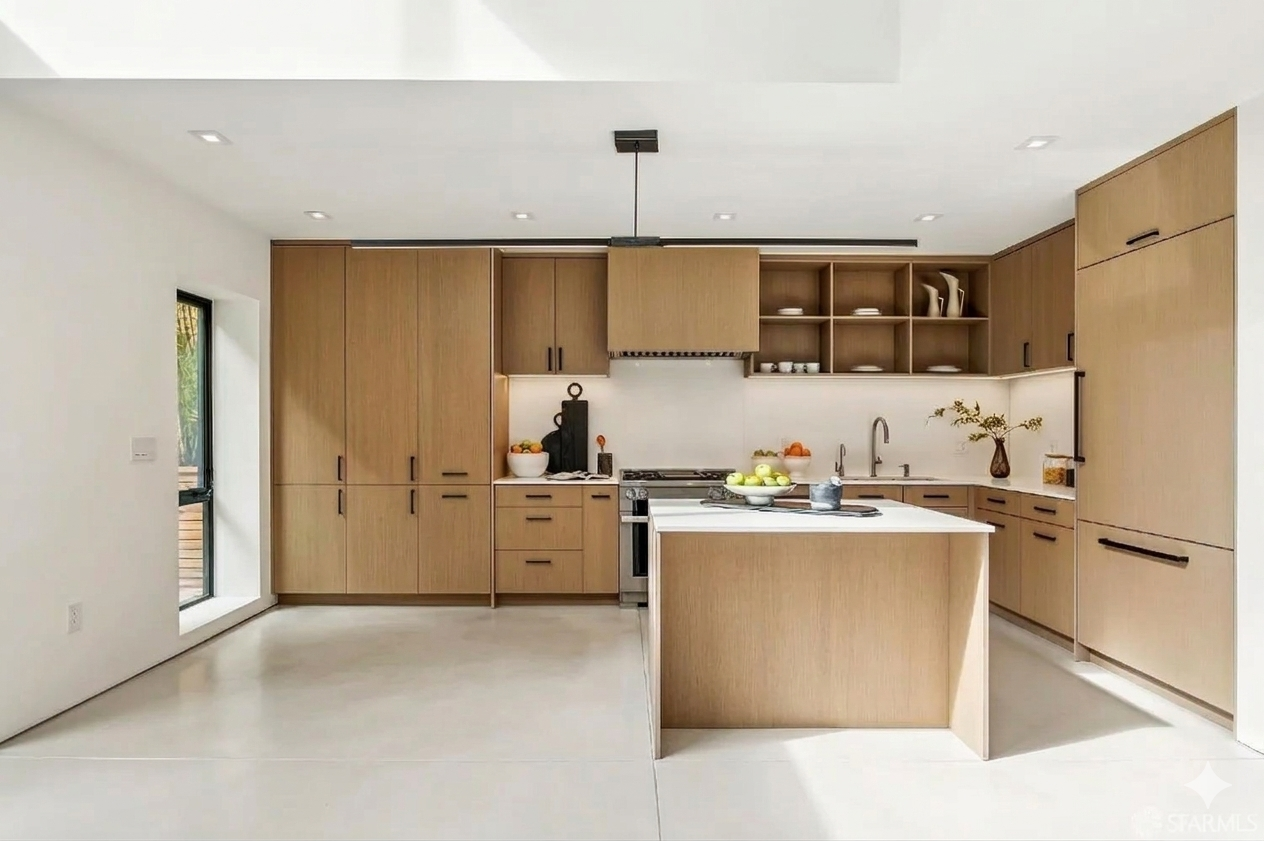
Instead of building a synthetic environment and hoping it transfers to reality, what if I could take a photo of a real space and automatically generate a physically accurate simulation of it? That was the main motivation for this problem. Using a multinomial source (image, video, or text) to produce a fully functional MuJoCo scene where any robot (used a Franka Arm for this) can receive natural language instructions and manipulate objects inside this environment. This is what I set out to build using the Y-Combinator x Deepmind Hackathon.
Here's how I built it, and everything that went wrong (or right) along the way.
The Vision (and the Naivety)#
The original idea seemed really ambitious from snap a photo of your kitchen, say "pick up the coffee mug and put it in the sink," and watch a simulated robot do exactly that. Clean input, clean output.
What I didn't fully appreciate at the start was just how many layers of conversion that required:
- Multinomial Soruce → 3D scene reconstruction
- Scene → detected surfaces and objects
- Objects → physics-ready meshes
- Physics meshes → correct mass, friction, joint properties
- All of that → a MuJoCo XML file that actually runs
- MuJoCo → natural language robot control
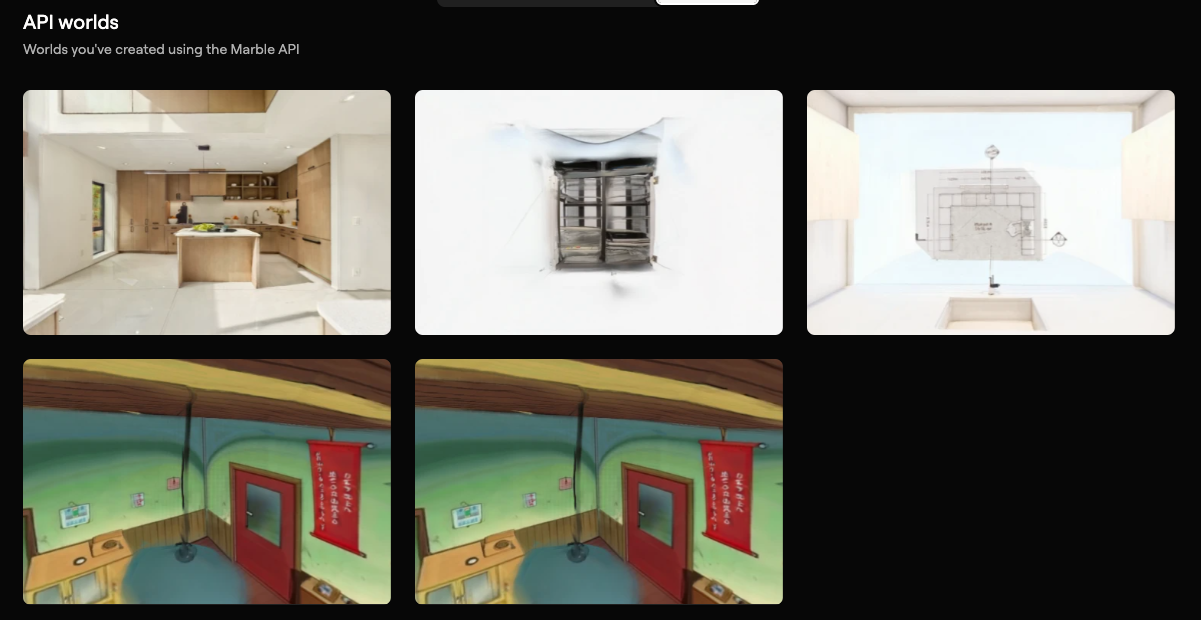
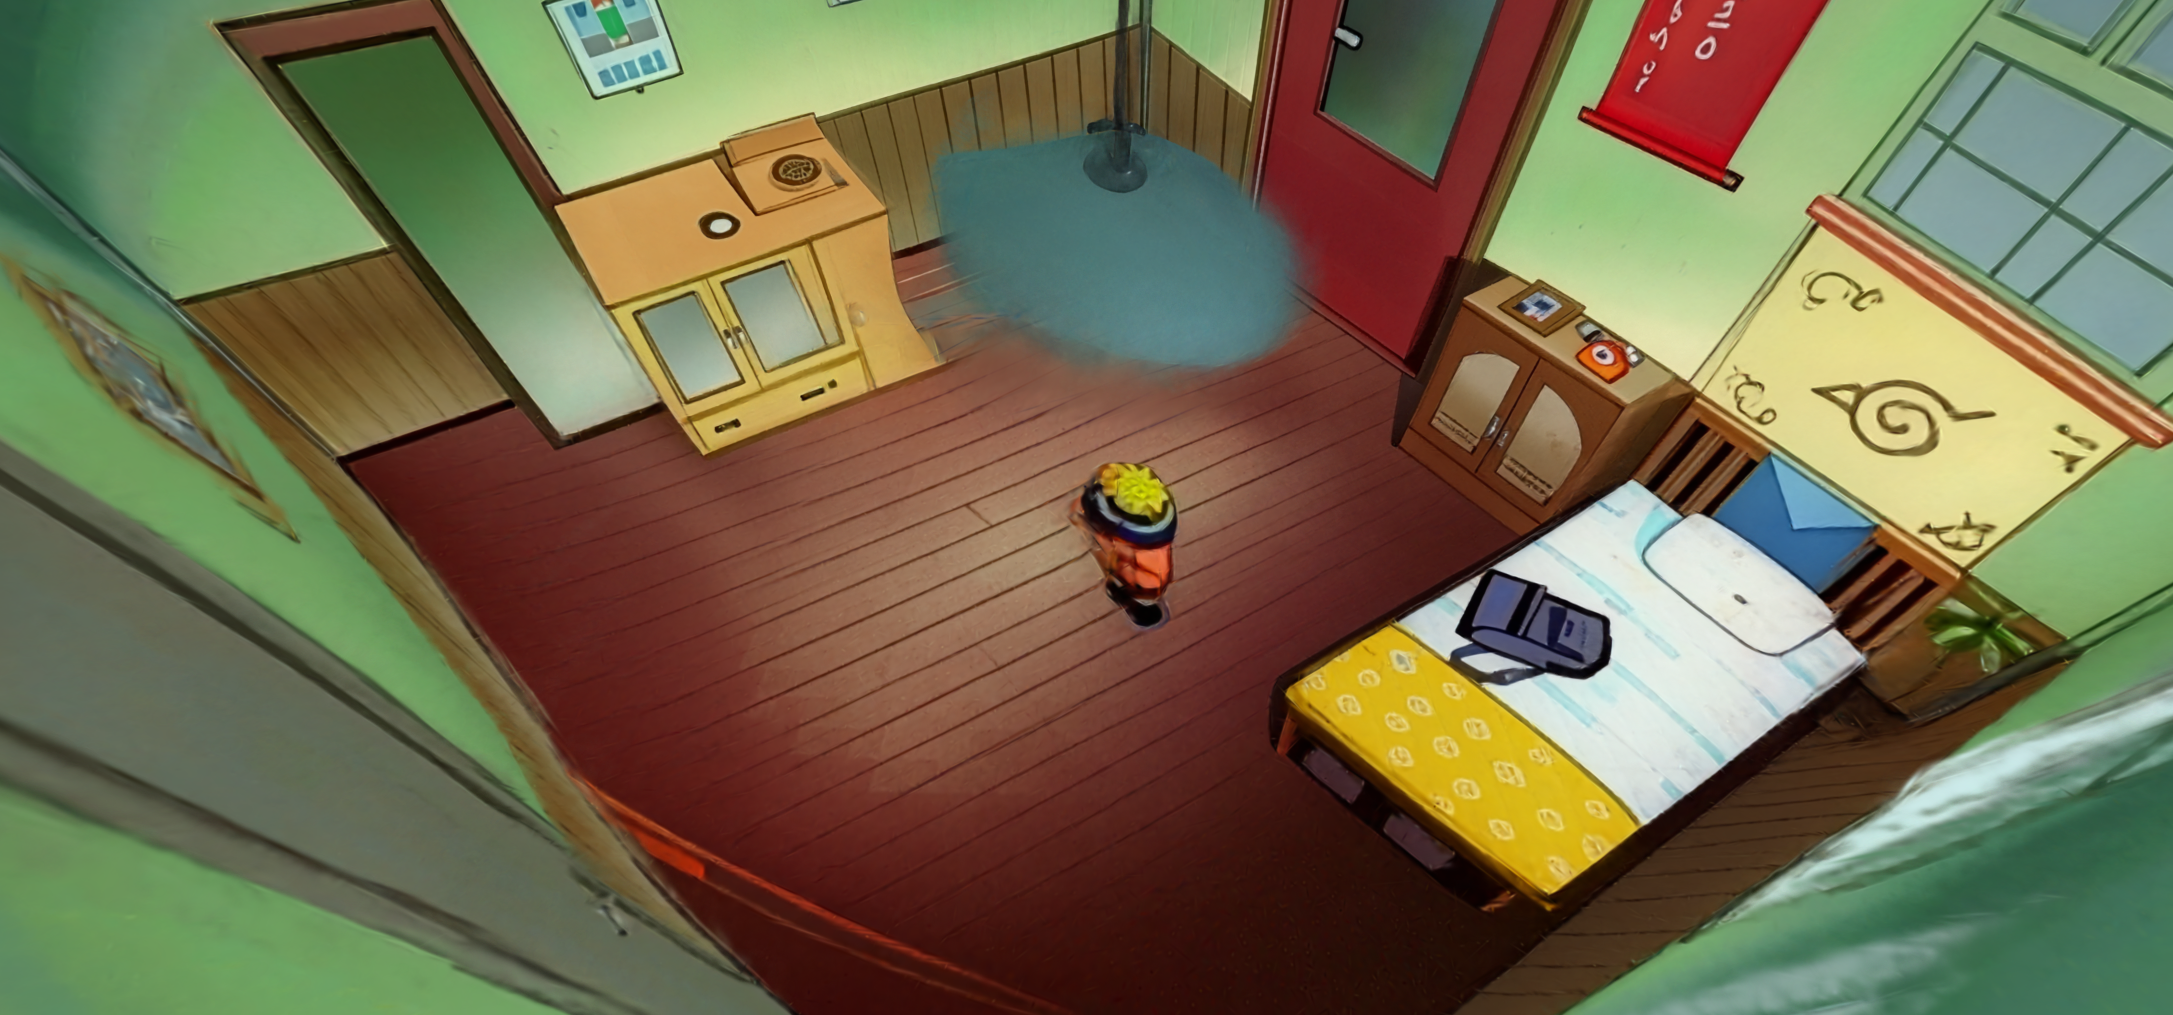
Every one of those steps is a hard problem individually. Chaining them all together, with every step's failures cascading downstream, turned out to be the real challenge. Additionally, using a multimodal source sounded really easy, but this turned out to be extremely precise. Originally, I used Naruto's room to try and generate this using Marble's API from World Labs. Due to distortion, I quickly learned that this doesn't generate an accurate world model. This was the first world I generated and it turned out to be extremely unrealistic.
Stage 1: Turning the World Into a 3D Scene#
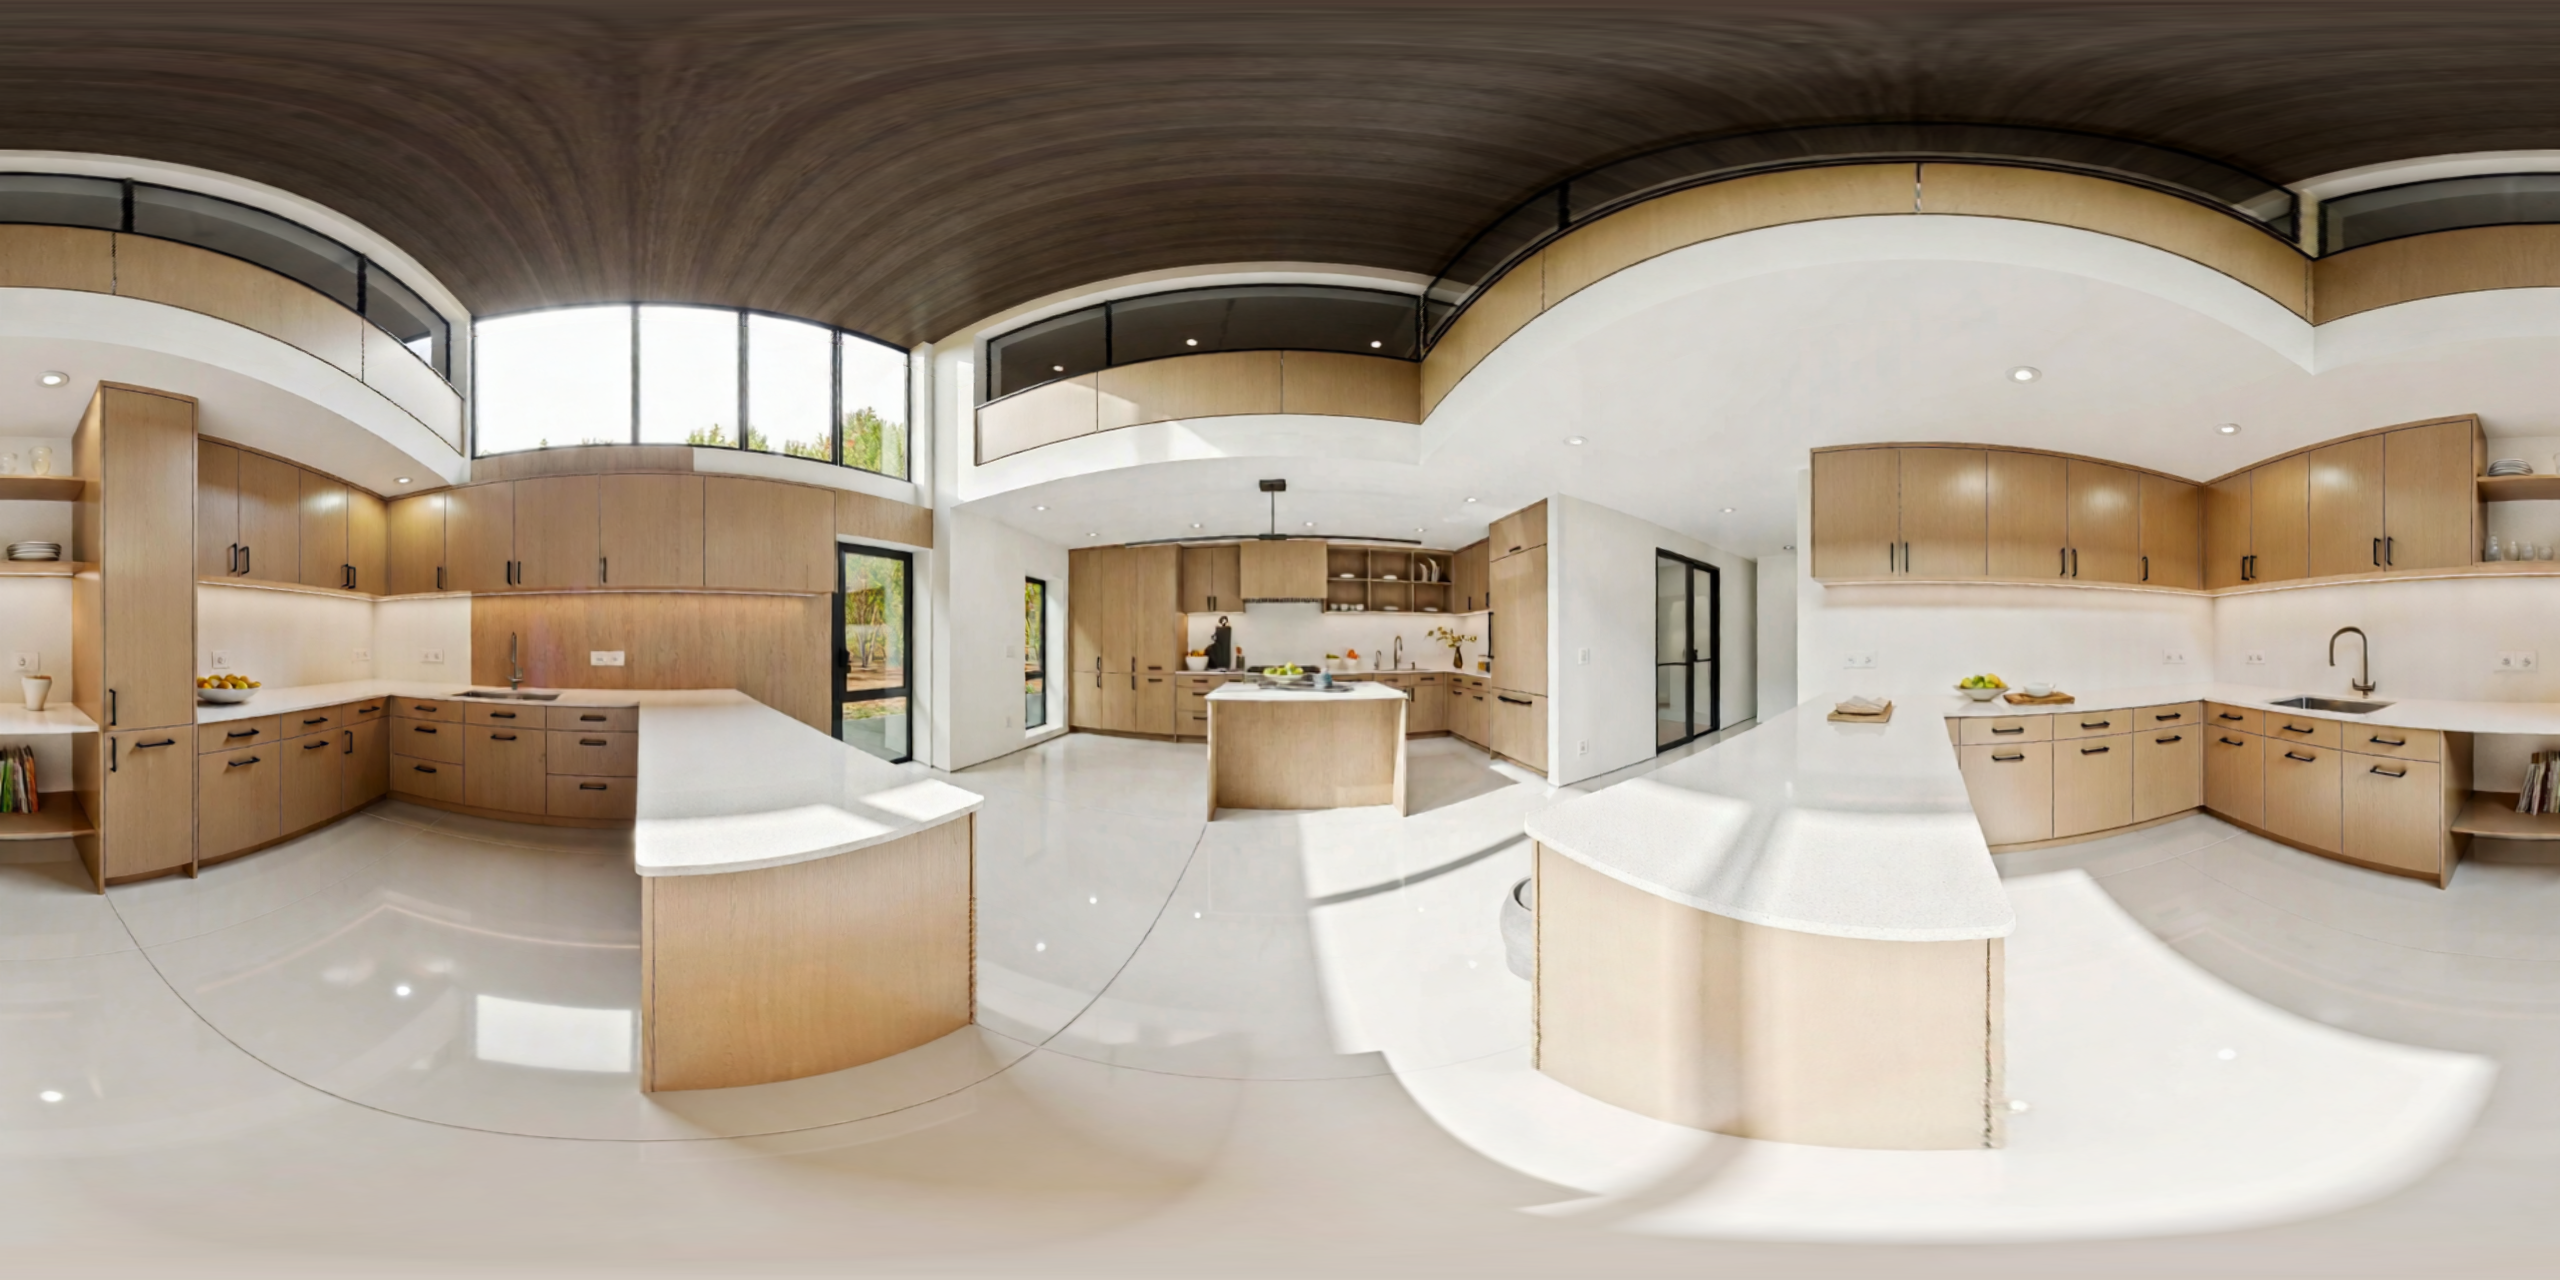
The first thing I needed was a way to reconstruct a 3D scene from images or video. I used the World Labs API, which takes text, images, or video and returns two things: a Gaussian splat (a photorealistic 3D representation made of millions of tiny translucent blobs) and a collider mesh (a coarser polygon mesh of the same space).
The Gaussian splat looks real. But it's completely useless for physics because you can't do collision detection against a cloud of Gaussians.
The challenge I ran into: how do I know where things are? The collider mesh tells me there's geometry at certain coordinates, but it doesn't know what a "counter" or "table" is. I needed to extract meaningful surfaces that a robot could actually stand next to and place objects on.
I used Open3D's RANSAC plane segmentation to detect horizontal planes in the collider mesh. RANSAC fits a plane model to subsets of points iteratively, so it finds the dominant flat surfaces like the floor, countertops, tabletops and extracts their heights and extents. From there, an ArenaBuilder generates phantom physics primitives: invisible floor planes, surface boxes, lip walls to keep objects from falling off edges, and perimeter walls so nothing escapes the simulation. The Gaussian splat gives you the photorealistic visuals. The phantom geoms give you stable physics. The two layers live separately and never interfere with each other.
Stage 2: Where Do 3D Objects Come From?#
Reconstructing the background environment was one problem. But a robot manipulation scene needs interactive objects like mugs, boxes, drawers, bottles which can actually be picked up and moved. The background Gaussian splat is static. It can't be grasped.
My solution was to use Claude to analyze the input photo and identify the interactive objects present in the scene. Given an image, Claude would return a structured list: ["coffee mug", "wooden cutting board", "cereal box", "fruit bowl"]. Then I'd spin up a Meshy AI job for each one to generate a full 3D model from just the object's name.
MeshyAI returns a detailed GLB mesh in under a minute for most objects. Meshy meshes are visually detailed but often concave and unpredictable in scale.
A coffee mug from Meshy might be 2 meters tall, or 2 centimeters. The handle might be a separate disconnected shell that doesn't touch the main body. The internal geometry might have inverted normals. None of this matters for rendering, but all of it catastrophically breaks physics simulation.
I wrote a normalization layer using trimesh that would:
- Compute the object's bounding box and rescale it to a physically plausible size based on its semantic label
- Center the origin at the base of the object (not the centroid)
- Merge disconnected shells where possible
- Filter out degenerate faces and zero-area triangles
This worked but it required me to maintain a rough size reference table: a coffee mug should be about 10cm tall, a cereal box about 28cm, a water bottle about 25cm. Any error in those references and objects would be either giant or microscopic in the final scene.
Stage 3: The Convex Decomposition Problem#
Here's something that took me a long time to fully internalize: MuJoCo can only do fast, stable collision detection with convex meshes. A coffee mug is not convex. Neither is a chair, a bowl, or basically any real-world object that has holes or concavities.
MuJoCo technically supports non-convex meshes, but the simulation becomes unstable and objects tunnel through each other or explode apart. The standard solution is convex decomposition by breaking a concave mesh into multiple convex pieces that together approximate the original shape. This is like packing the mug with a set of convex blobs that fill every nook of its volume.
I used CoACD (Approximate Convex Decomposition) to do this. For each object mesh, CoACD would return 8–16 convex hulls. Those hulls became the collision geometry in MuJoCo, while the original high-resolution Meshy mesh was kept purely for visual rendering.
The dual-mesh pattern: one mesh for visuals, a separate set of convex hulls for physics became a theme that ran through the whole project. The World Labs background uses the same split: Gaussian splat for visuals, RANSAC-extracted planes for physics. Meshy objects: full GLB for visuals, CoACD hulls for physics.
Running CoACD on every object added time to the pipeline. Some complex objects like a chair with four thin legs would produce more hulls, and those hulls weren't always perfect approximations. Occasionally a decomposition would slightly inflate an object's geometry, causing it to hover above the surface it was supposed to rest on. I had to add a settling phase at simulation startup (run the physics for a few hundred steps before the robot starts moving) to let gravity pull everything into contact correctly.
Stage 4: Making Claude Understand Physics#
The Meshy's API gives you a mesh, but it doesn't tell you how heavy a mug is, whether it slides or grips, or whether it has a lid that can be opened. All of those properties are essential for realistic simulation.
I built a semantic labeling stage where I'd pass each object's name, a rendered thumbnail of its mesh, and the scene context to Claude with a structured prompt. Claude would return an ObjectManifest a dataclass with:
mass_kg: best estimate given material and sizefriction: based on inferred surface material (ceramic, metal, cardboard, etc.)restitution: bounciness coefficientjoint_type: is this rigid, or does it have a hinge (like a door) or a slider (like a drawer)?- Affordances:
is_graspable,is_pushable,is_openable,support_surface material_class,size_class,notes
Claude consistently gave reasonable physics estimates ceramic objects got mid-range friction, metal objects got slightly lower, cardboard got high friction. The affordance flags were mostly correct: mugs and bottles flagged as graspable, walls and surfaces flagged as not graspable.
The failure mode was containers with lids. Claude would sometimes mark a jar as having a hinge joint when it actually needed a screw constraint, or mark a cereal box as openable when it should be rigid. I ended up adding a two-pass captioning approach: first extract structured JSON with specific spatial and physical metrics, then synthesize the final manifest from that JSON. This prevented Claude from "losing" details in free-form generation.
Stage 5: Writing the MJCF File#
Now I had:
- A world collider mesh
- Physics primitives for surfaces
- Normalized visual meshes for each object
- Convex hull decompositions for collision
- An
ObjectManifestwith physics properties for each object
Now I had to assemble all of it into a single MuJoCo MJCF XML file that described the entire scene. The mjcf_composer.py module handles this, writing body definitions for each object, including both visual (group=1) and collision (group=0) geometry, setting up joints for openable objects, configuring actuators for the robot arm, and generating a keyframe with the initial state.
The keyframe turned out to be critical and non-obvious. Without an explicit initial state keyframe, MuJoCo would start the simulation with all free bodies at the origin, and the first few frames would be an explosion of objects flying everywhere as gravity sorted things out. The keyframe pre-specifies every free body's position and the robot's joint angles, so the scene starts already settled.
The robot's base position had to be specified in the MJCF before compilation, but I needed to compile the scene to know where the surfaces were so I could position the robot correctly. The solution was a two-pass approach: compose a preliminary scene, detect surface positions, compute the optimal robot base position relative to the primary workspace, then rewrite the MJCF with the correct position injected.
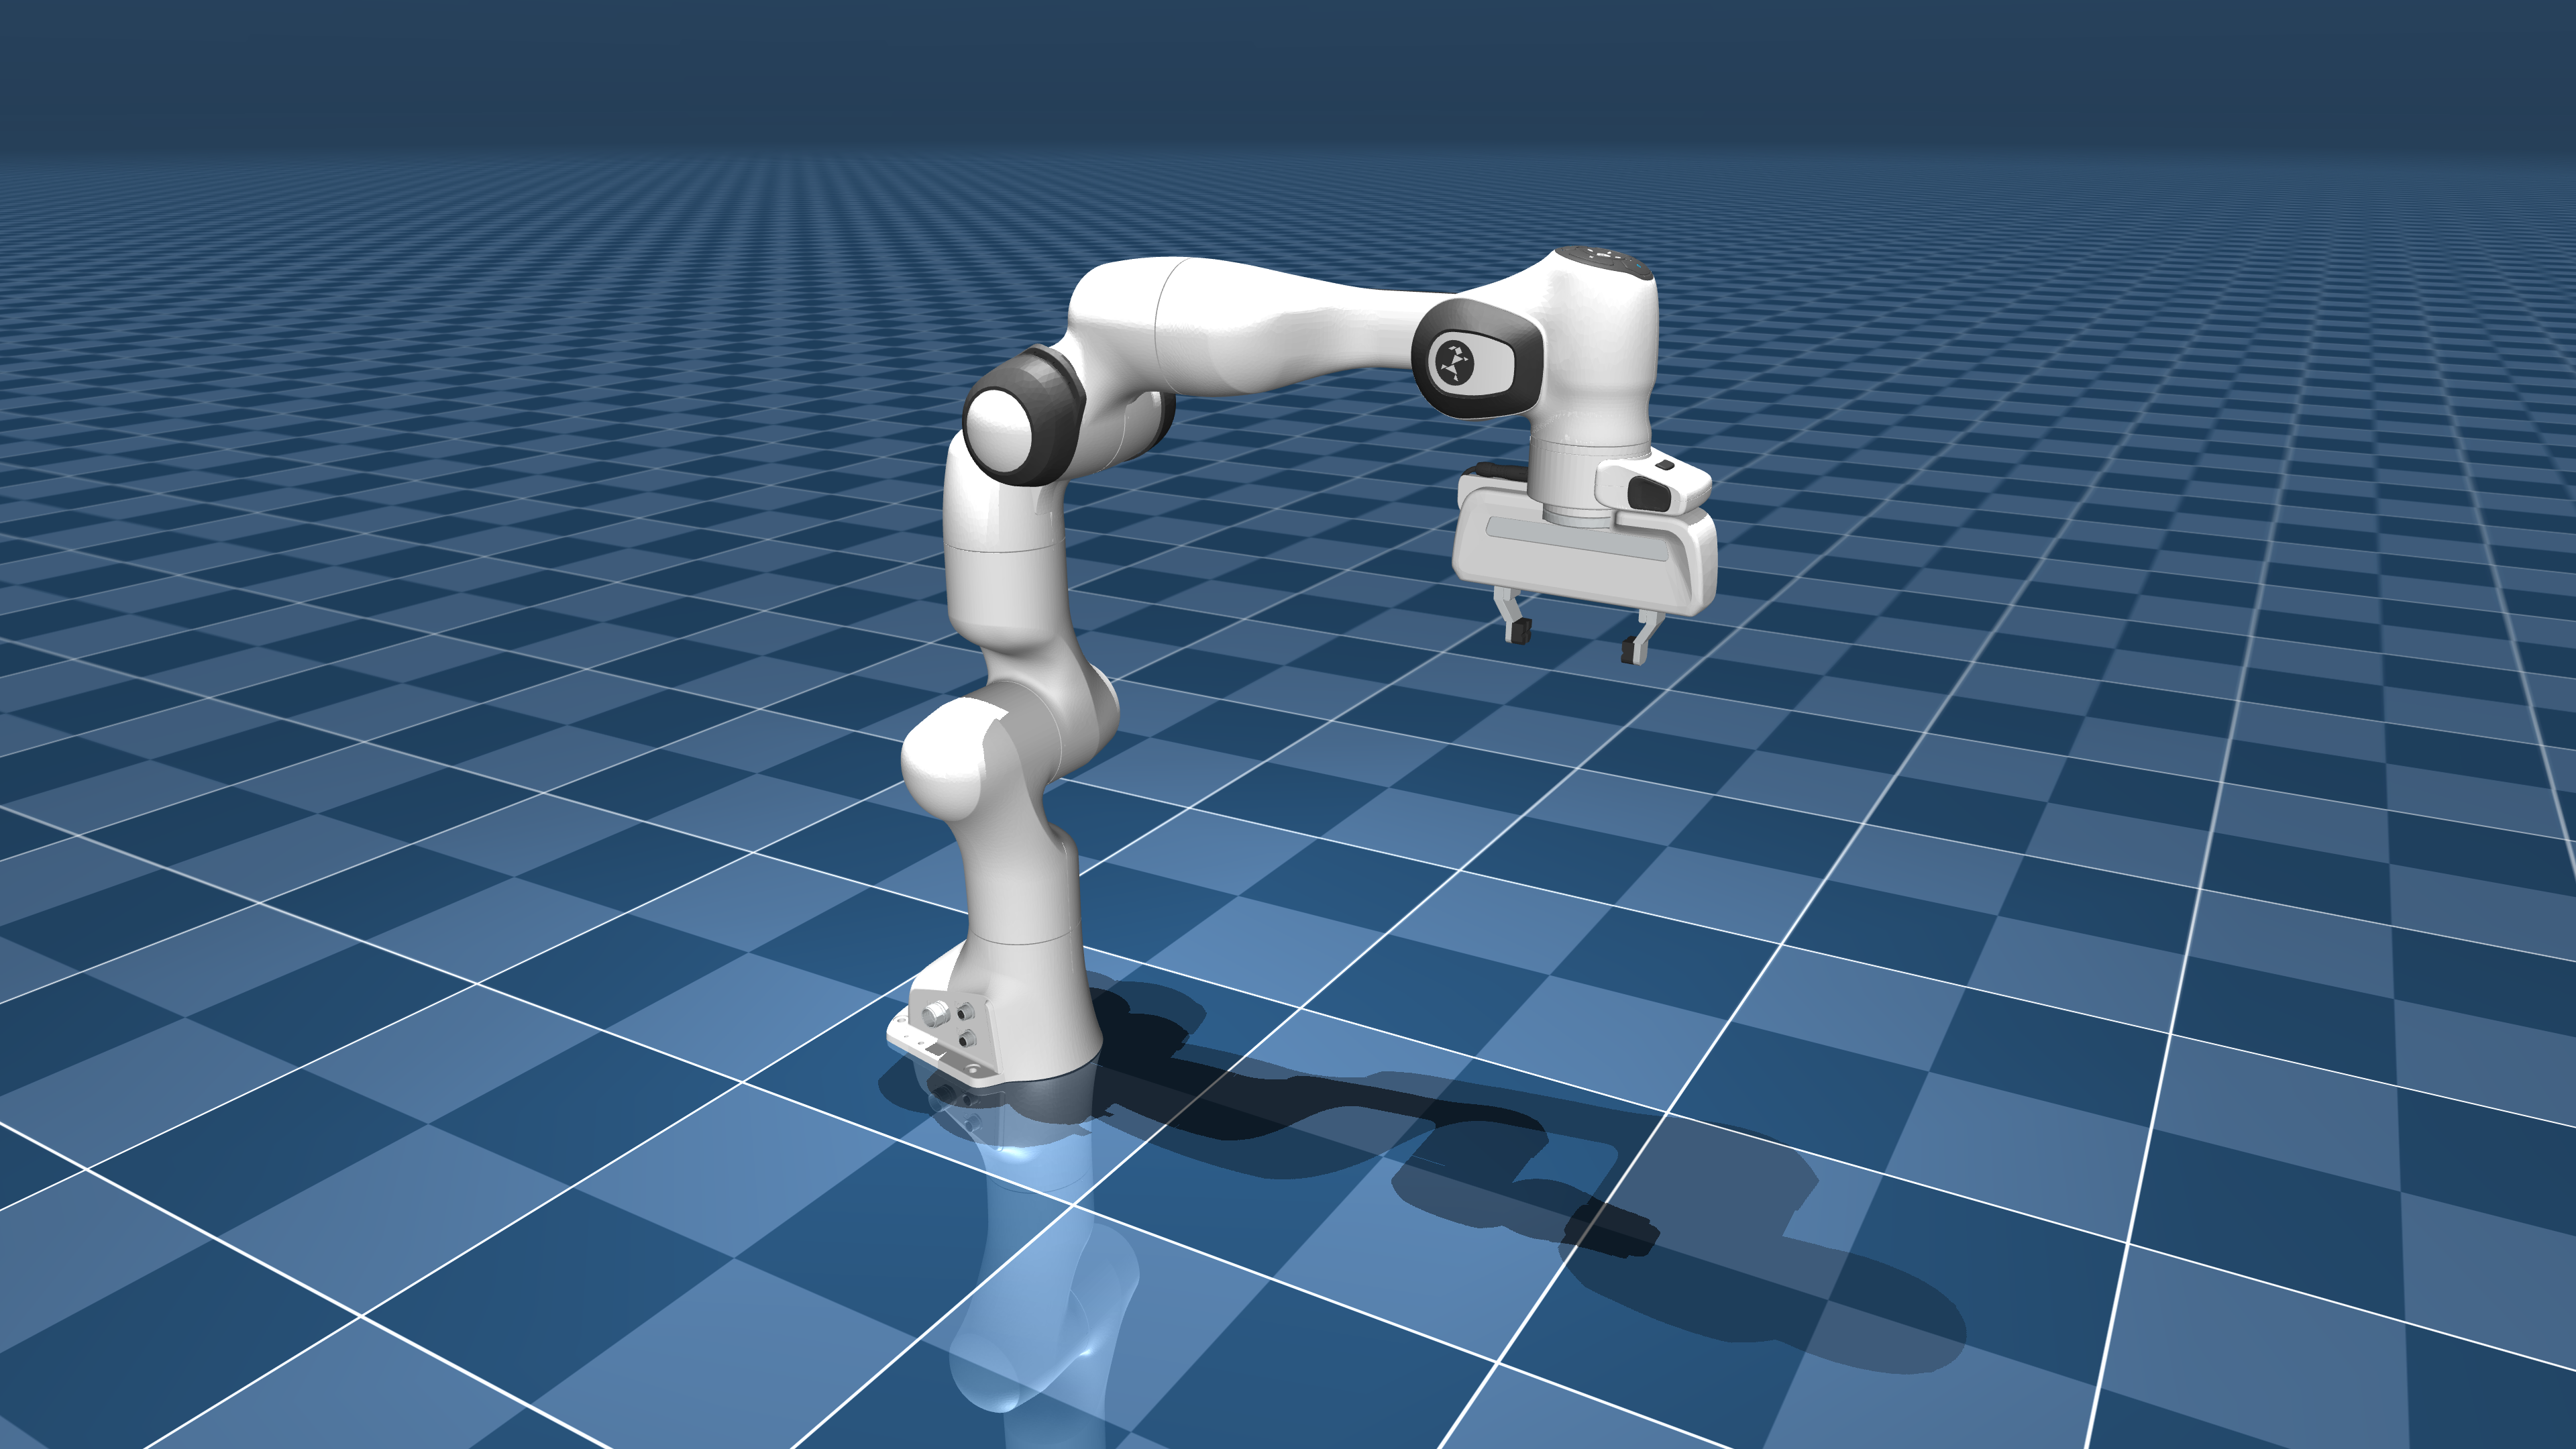
Stage 6: Franka Arm#
With the scene working, I needed the robot to actually do things. I built a FrankaPrimitives class providing high-level skills: go_home, move_ee_to, grasp_object, push_object, open_drawer, and a few others.
The underlying motion uses Jacobian IK with Damped Least Squares (DLS). It computes the Jacobian of the end-effector position with respect to joint angles, then invert it (with damping to avoid singularities) to find the joint velocity that moves the end-effector toward the target. Iterate until convergence.
for each iteration:
    J = end-effector Jacobian
    err = target_position - current_ee_position
    dq = J.T @ solve(J @ J.T + λ²I, err)
    q += clip(dq, -step, +step)
    if ||err|| < tolerance: break
The wrist constraint was a subtle addition. For grasping, you want the gripper to approach from a specific direction so the fingers close around the object in a stable antipodal grasp. I added an optional joint7 (wrist) pin that re-projected the IK solution onto the subspace where the wrist stayed at the desired angle. This gave much more reliable grasp success rates.
Stage 7: Language-Controlled Robot with Code-as-Policies#
The most satisfying part of the whole project was the task planner. The idea behind Code-as-Policies is simple where instead of training an end-to-end neural network to map language to motor commands, you use an LLM to write Python code that calls a fixed set of robot primitives.
# Natural language: "Pick up the mug and place it on the wooden tray"

# Claude generates:
robot.grasp_object("coffee_mug")
robot.move_ee_to(manifests["wooden_tray"].position + [0, 0, 0.1])
robot.open_gripper()
The TaskPlanner class handles this: build a system prompt listing all available primitives with their signatures, inject the current scene's object list and positions, then ask Claude to generate the minimal Python needed. Execute it with exec() in a controlled namespace that only has access to the robot primitives and object manifests.
I spent the most time on was object occlusion and placement uncertainty. Claude would generate code that assumed an object was at a specific position, but after the settling phase, objects had shifted slightly. The grasp would miss by 2–3cm and fail. I added a live position lookup where instead of using the manifest's pre-settled position, the code would query the current MuJoCo simulation state for the object's actual position at execution time.
Stage 8: The RL Grasp Optimizer#
Even with good IK and correct object positions, grasping remained unreliable for oddly shaped objects. A mug handle requires a different approach angle than grasping the mug body. A thin paperback book needs finger pressure from the sides, not the top.
I built a simple RL retry loop using epsilon-greedy exploration:
epsilon = max(0.2, 1.0 * (0.85 ** attempt))  # decay exploration rate
if best_params and random() > epsilon:
    return exploit(best_params, tight_noise)  # small perturbations around best
else:
    return explore(loose_bounds)  # sample the full search space
Each attempt gets a shaped reward combining end-effector distance to the object and achieved lift height. The best parameter set (approach angle, height offset, finger width) is retained across attempts. Exploration starts wide and narrows as the agent finds good configurations.
It's not reinforcement learning in the deep learning sense there's no neural network, no replay buffer. But the exploration-exploitation tradeoff with shaped rewards gave noticeably better grasp success rates than any fixed strategy I'd tried.
The Dual Renderer#
Throughout everything, I wanted the simulation to look like the real space the photo came from. Running MuJoCo's built-in viewer shows you grey capsules and boxes. Not exactly photorealistic.
The solution was a two-renderer architecture:
- MuJoCo handles all physics at 500Hz
- Three.js + Gaussian splats runs in the browser and displays the actual scene
A WebSocket server streams body transforms from MuJoCo to the Three.js renderer in real time. The Gaussian splat provides the photorealistic background. Object poses are applied to the visual GLB meshes in Three.js, so when the robot lifts a mug in physics, the mug visually lifts inside the photorealistic kitchen.
Getting the coordinate systems aligned between MuJoCo (Z-up, right-handed) and Three.js/WebGL (Y-up) took longer than I'd like to admit. There were a few hours of objects floating at wrong heights and rotating around the wrong axis before I got the transform conventions sorted out.
What I'd Do Differently#
Better surface placement. The RANSAC plane detection works, but it can miss small or cluttered surfaces. Several times objects were placed at incorrect heights because the surface detection didn't pick up a particular counter. A learned surface segmentation model would be more robust.
Uncertainty-aware grasping. The IK solver doesn't know when it's in a poor configuration so it just reports whether it converged. Adding a reachability metric that considered manipulability (determinant of J*J.T) would help avoid degenerate configurations where the arm is technically at the right position but about to hit a singularity.
Better mesh normalization for composite objects. Objects like chairs or shelving units that consist of multiple distinct parts in the Meshy output were hard to handle. The current normalization logic treats the entire mesh as a rigid body, but something like a chair would ideally have seat, legs, and back treated as a single rigid unit with convex decomposition across all of them. This sometimes required manual intervention.
Async pipeline stages. The current pipeline runs each stage sequentially. Meshy generation for multiple objects, CoACD decomposition, and Claude labeling are all parallelizable. Running them concurrently would cut pipeline time substantially.
What Actually Worked#
The two-pass Claude captioning for semantic labeling was a pattern I stumbled onto while debugging and ended up being robustly reliable. First-pass: extract a structured JSON with every metric you care about explicitly named. Second-pass: synthesize from the JSON. This sidesteps the tendency of LLMs to drop specific numbers when writing in flowing prose.
The dual-mesh architecture visual meshes for rendering, convex hulls for physics, phantom geoms for stable backgrounds became a clean separation that made both the rendering and the physics better. It required discipline to maintain (always know which layer you're in) but paid off consistently.
Code-as-Policies with Claude worked far better than I expected for a zero-shot setup. Instructions like "pick up the red cup and pour it into the bowl" reliably generated correct, working code on the first try. The key was spending time on the system prompt being explicit about exactly which primitives exist, what their signatures are, what coordinate frame positions are in, and how to query current object positions.
github: https://github.com/wlu03/ego2sim
note: the three.js rendering takes alot of cpu power to run. my browser crashed many times when running the server + three.js rendering